Applies To
LexWorkplace Starter, Core, Advanced
The team at Uptime Legal will manage your LexWorkplace onboarding, including data migration, addin installation, and training.
When you add new users to your LexWorkplace account, or need to setup LexWorkplace on a new computer, you can follow this simple guide.
New User Account
If adding a new user, begin by contacting support to add a new user to your plan. We’ll just need that person’s first name, last name and email address. Once registered, LexWorkplace will send an email to the provided address with first-time login instructions.
If you already have a LexWorkplace user account and are simply setting up LexWorkplace on a new computer, you can skip this step.
If you’re starting a free trial of LexWorkplace, you can skip this step.
1. Install the LexWorkplace Launcher
The LexWorkplace Launcher is a small piece of software that runs in the background as you work, and makes document viewing, editing and saving work seamlessly. It needs to be installed on each user’s computer (Windows and Mac).
Download the Launcher from within the LexWorkplace application by navigating to:
Settings > Download LexWorkplace Launcher
Download and run the installer. When complete, the Launcher will open automatically, and prompt you to log in. Log in with your LexWorkplace username and password. Once connected, the Launcher will run in the background.
2. Install the Outlook Add-in
Next, install the LexWorkplace add-in for Outlook, which is used to save emails to matters. This process varies slightly depending on what Exchange service your firm uses. Select the appropriate option below based on what Exchange service your firm subscribes to.
Uptime Legal Hosted Exchange (Practice Gen 10 + Older)
Log into Outlook Web Access (OWA) for your Exchange email service.
For Uptime Hosted Exchange, this is located here.
For on-premise or third-party Hosted Exchange, please refer to your Exchange administrator for instructions.
Once logged into OWA:
Download the Manifest File
Open the URL https://addin.lexworkplace.app/manifest-dist.xml
Save this XML file to your local computer
Install the Addin
Click Settings (Gear Icon, top right of your OWA screen) > Get Addins
Click My Addins
Scroll to Custom Addins (at the bottom of the next screen)
Click Add > From File
When prompted, select the XML file you downloaded earlier
Click Install, then OK when complete
Microsoft 365 Exchange
Log into Outlook Web Access (OWA) for your Office 365 account.
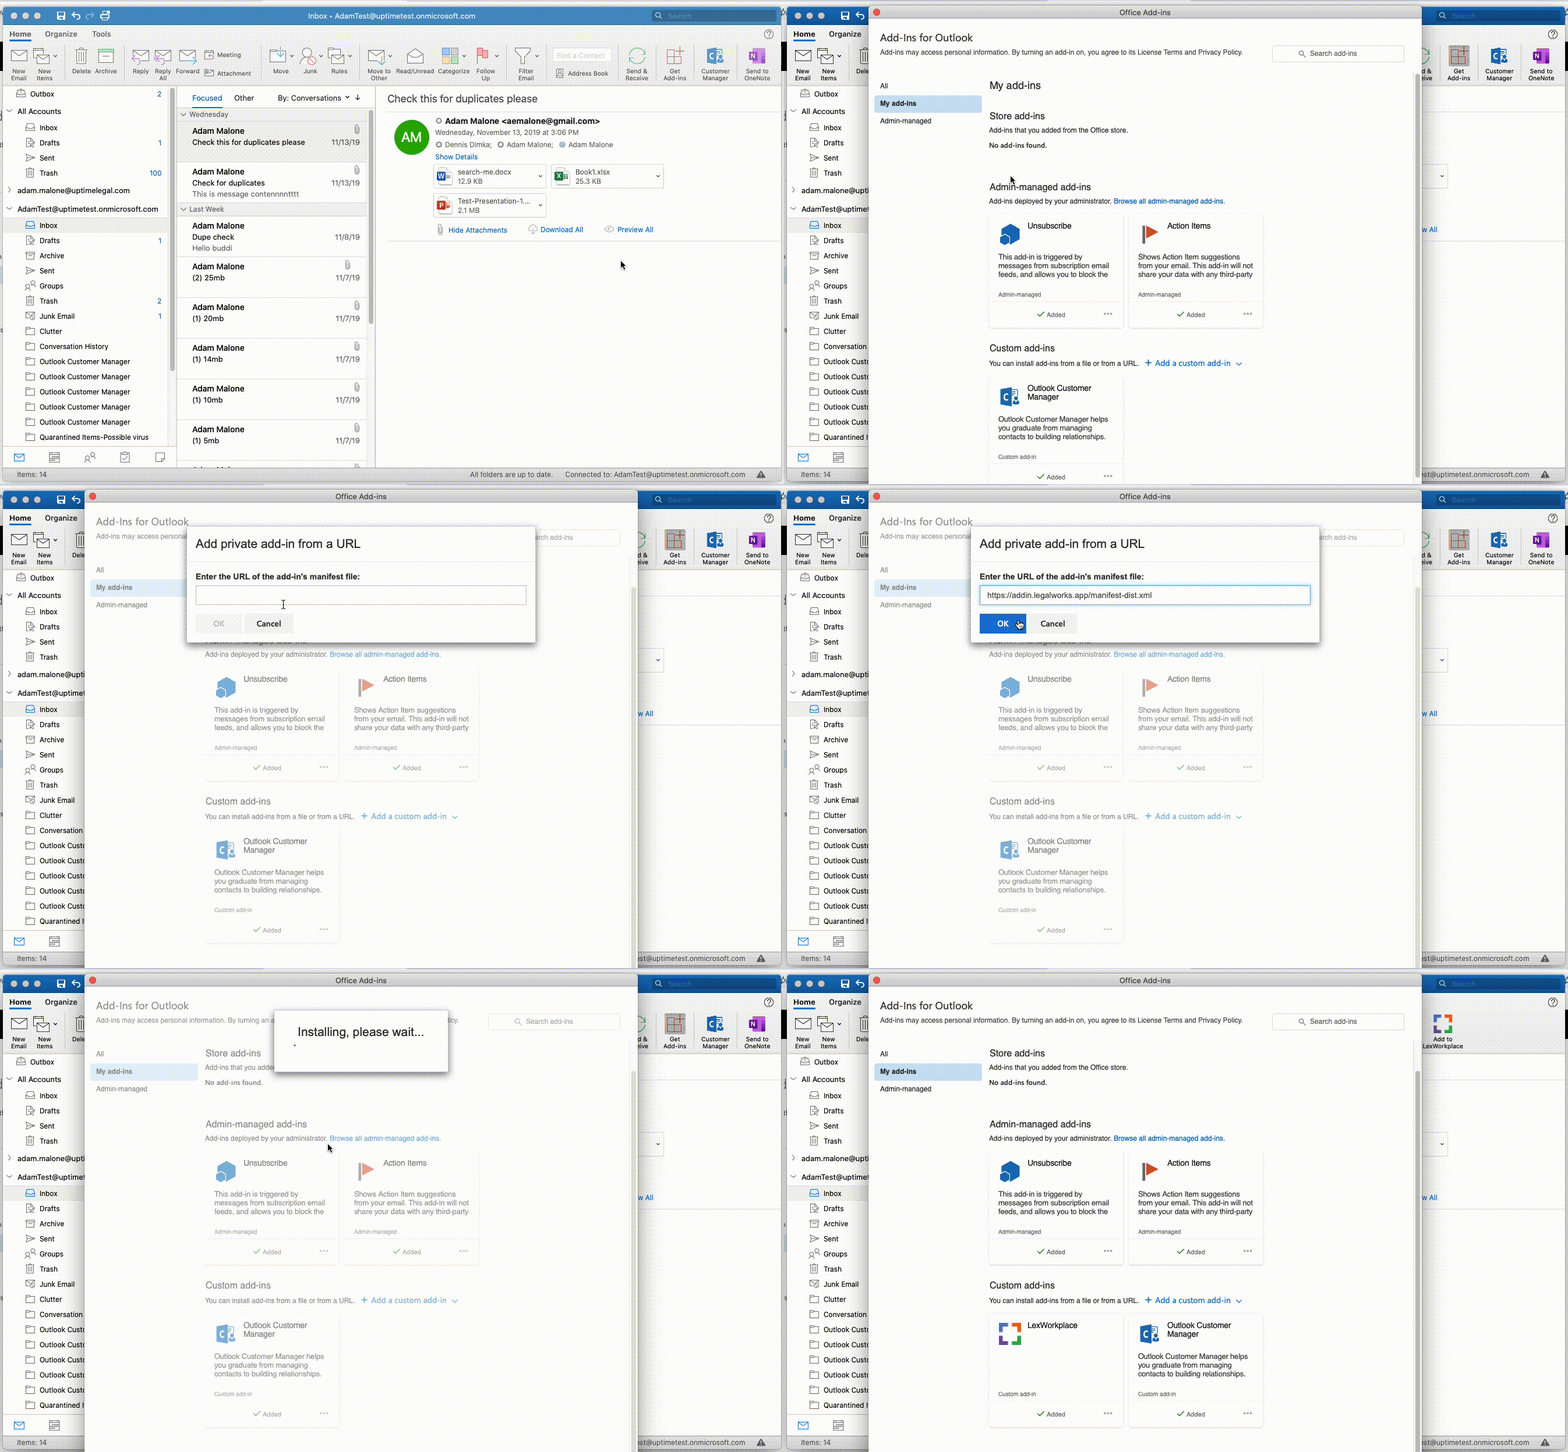
Open Outlook (the desktop version).
Click the File menu (top left), then click Manage Add-ins.
You may be prompted to enter your credentials for your Office 365 / Outlook Web Access account.
Note: If this process does not work, you may also click My Add-Ins from the Outlook ribbon, which should also bring you to Outlook Web Access.
Once logged into OWA:
Download the Manifest File
Open the URL https://addin.lexworkplace.app/manifest-dist.xml
Save this XML file to your local computer
Install the Addin
Click Settings (Gear Icon, top right of your OWA screen) > Get Addins
Click My Addins
Scroll to Custom Addins (at the bottom of the next screen)
Click Add > From File
When prompted, select the XML file you downloaded earlier
Click Install, then OK when complete

Note: Users of older versions of Outlook may need to use our Legacy Outlook Add-in. Click here to download the manifest (XML) file when installing the add-in via OWA (as described above).
3. Add Outlook Category for LexWorkplace (Recommended)
This step is optional but recommended for the optimal LexWorkplace experience.
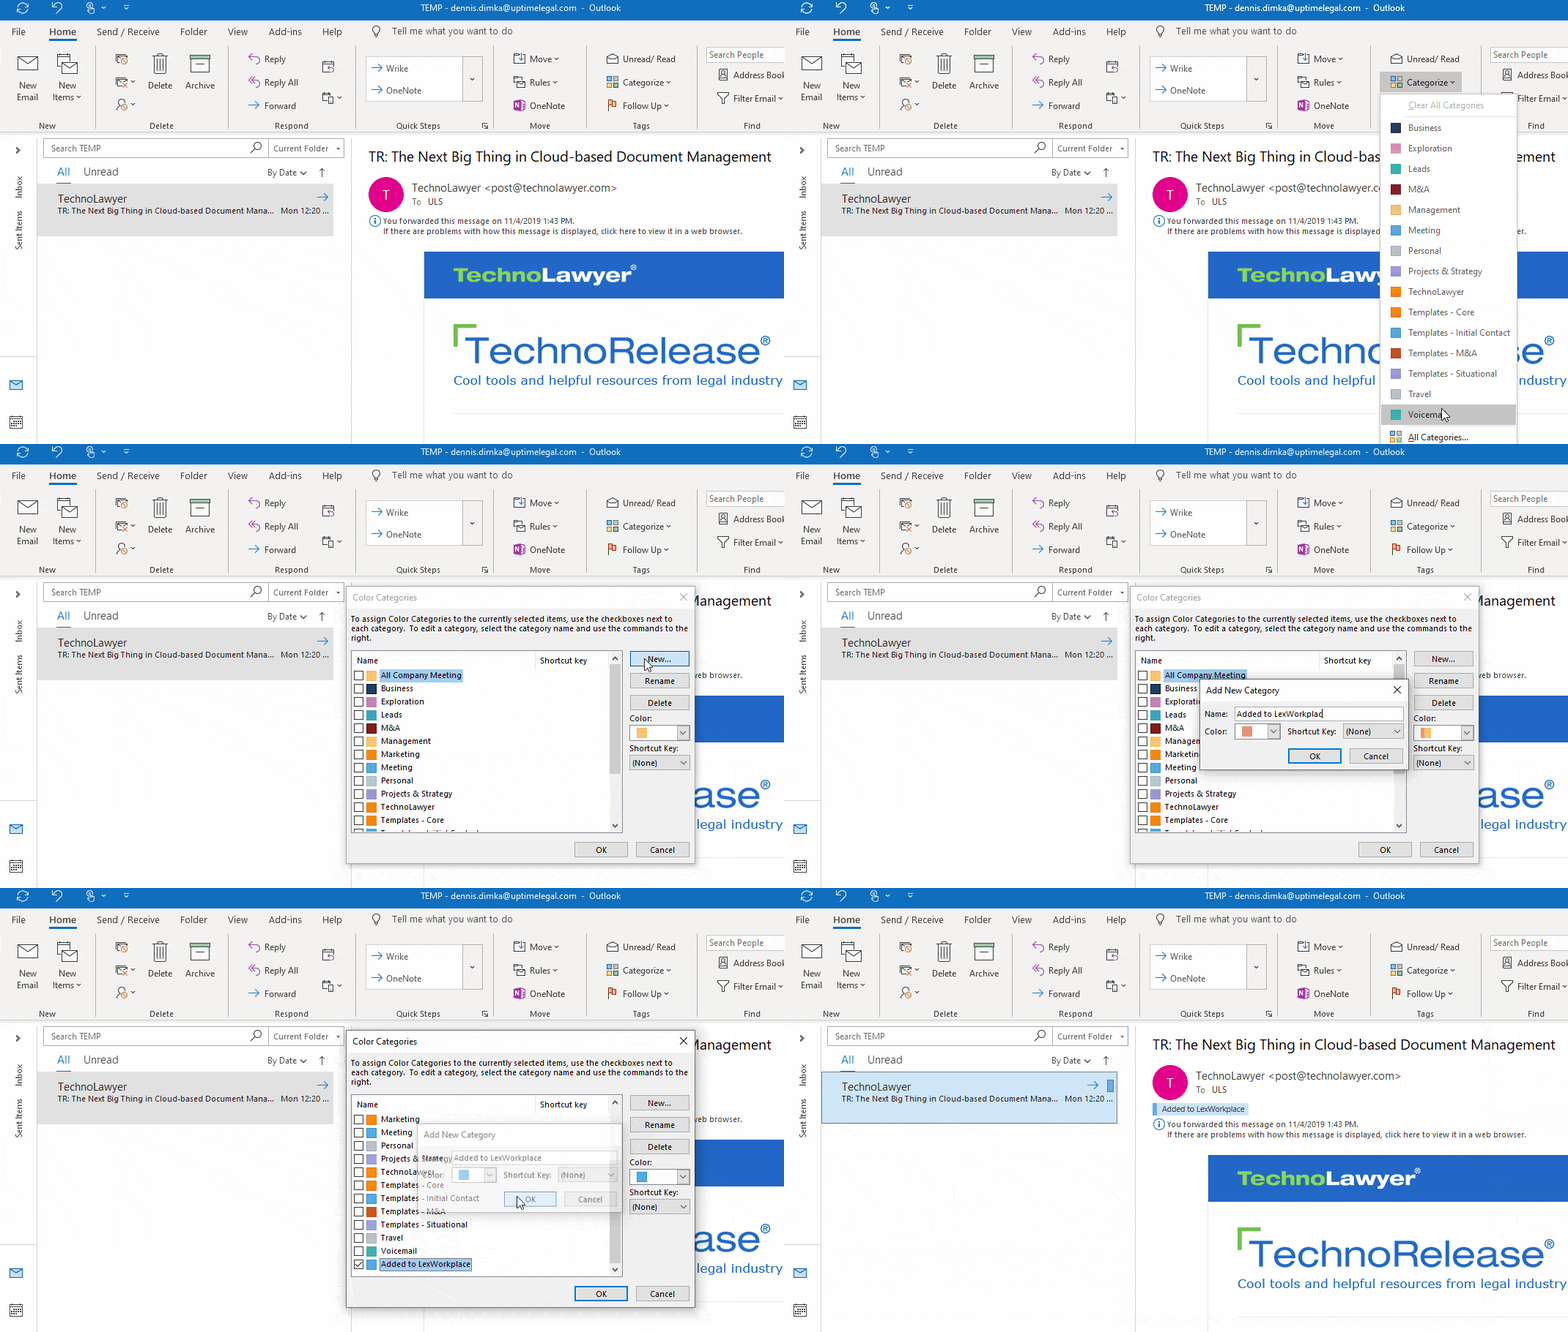
LexWorkplace will mark email messages that you file to a matter as “Added to LexWorkplace.” It does this by applying this category to your Outlook.
While this step is optional, we recommend creating this category in your Outlook and assigning it a color, so that you can quickly identify emails that have been filed to a matter in LexWorkplace).
Steps to Create Category in Outlook
Click Categories on the Outlook top ribbon
Click All Categories…
Click New…
Give the new category the name: Added to LexWorkplace
Select a color for this category (recommended: Blue)

Additional Support
Need a little extra help? Don’t hesitate to Contact Support if you need a hand.